Assignment 5: Copper and Wood

For this week's assignment, we were asked to create something made of two different materials -- but not acrylic or plywood. I decided to try to work with copper and wood and create a laptop table for my couch at home.

I found this example online and used it as inspiration for my assignment.

I wanted to use some of the extra wood from my tripod dolly assignment, but I didn't have quite enough wood so I broke down one of the dollies.

IMG_2796-e1481157553631.jpg
I glued the top of the table using wood glue, rubber bands, and these large wooden clamps and I let it sit overnight.

I glued the top of the table using wood glue, rubber bands, and these large wooden clamps and I let it sit overnight.

IMG_2797.jpg
I used wood putty to fill the  pivoting hole still left over from the dolly leg.

I used wood putty to fill the  pivoting hole still left over from the dolly leg.

The next day, I sanded the top of the table, added a wood stain that would work well with the copper and added a protective finish. After the stain was applied, the wood putty hole looked just like another knot, which is great!

IMG_2801-e1481157593223.jpg

Next, I moved on to cutting the pipes to size.  When at home the night before, I measured the height of the seat cushions on my couch so that I could customize the height of the table to fit my space.

I borrowed a manual pipe cutter from Ben to cut the pipes.  Here's a great video that explains how to use this device.

IMG_2804-e1481157527727.jpg
Here are the final cut components for the base of the table. I purchased 90 degree angle and T- shaped joints that matched the diameter of the copper pipe purchased.

Here are the final cut components for the base of the table. I purchased 90 degree angle and T- shaped joints that matched the diameter of the copper pipe purchased.

To be sure that there was a secure attachment between the pipe and joint, I used Liquid Nails.

To be sure that there was a secure attachment between the pipe and joint, I used Liquid Nails.

The frame needs to dry after using the Liquid Nails for 6-8 hours so I will be posting the final product in the morning before class

IMG_2809-e1481159990435.jpg
IMG_2808-e1481159976625.jpg
Thursday 8AM -- here is what the table looks like after a night of drying:

Thursday 8AM -- here is what the table looks like after a night of drying:

As you might notice, there is a lot of strain in the top joint of the table.  It's not even 90 degrees when the wood in placed on top.

It seems that I made the base too thin and the top too long. With the added weight of a laptop, then this table will probably fall forward. :(

How might I fix this? Since we don't have welding in the shop, I can't add braces to the pipe, but what I might do is turn the wood top into landscape and shorten the pipes supporting the wood.

IMG_2810-3-e1481209400887.jpg

Assignment 4: Enclosure

For this week's assignment, we were tasked with creating an enclosure of any kind.My partner has had this Gristleizer effects kit for probably 5 years and hasn't been able to build it because he didn't have an enclosure and tools to customize it.

I thought this would be a perfect enclosure to make for class.

I found an enclosure on Amazon which was perfect because it already had the grates on the sides so that the contraption doesn't overheat, with removable, metal face and backplates, and rubber feet. I was looking for a particular box that had removable metal face and back plates so that I could customize the box easily. I was also interested in working with metal for this project because it's a material I haven't worked with much yet.

For my Gristleizer enclosure I wanted to etch what each knob did on the face plate. Luckily, this container was already painted blue, so I utilized this feature by etching off the paint to label the knobs.

Here is the Adobe Illustrator file that I created for the face plate for etching

fabrication_enclosure
img_2763
img_2763

First I tested the with cardboard

img_2766
img_2766

After a successful result, I etched on the face plate

img_2767
img_2767

Next, I moved to the drill press to drill the holes for the face plate and back plate.

img_2770
img_2770

This ended up taking quite a bit of time because many of the components had different size holes.  Additionally, I didn't have a stepper bit, so any hole that was larger than 0.2 inches, I had to use three different bits of increasing size to cut the metal properly.

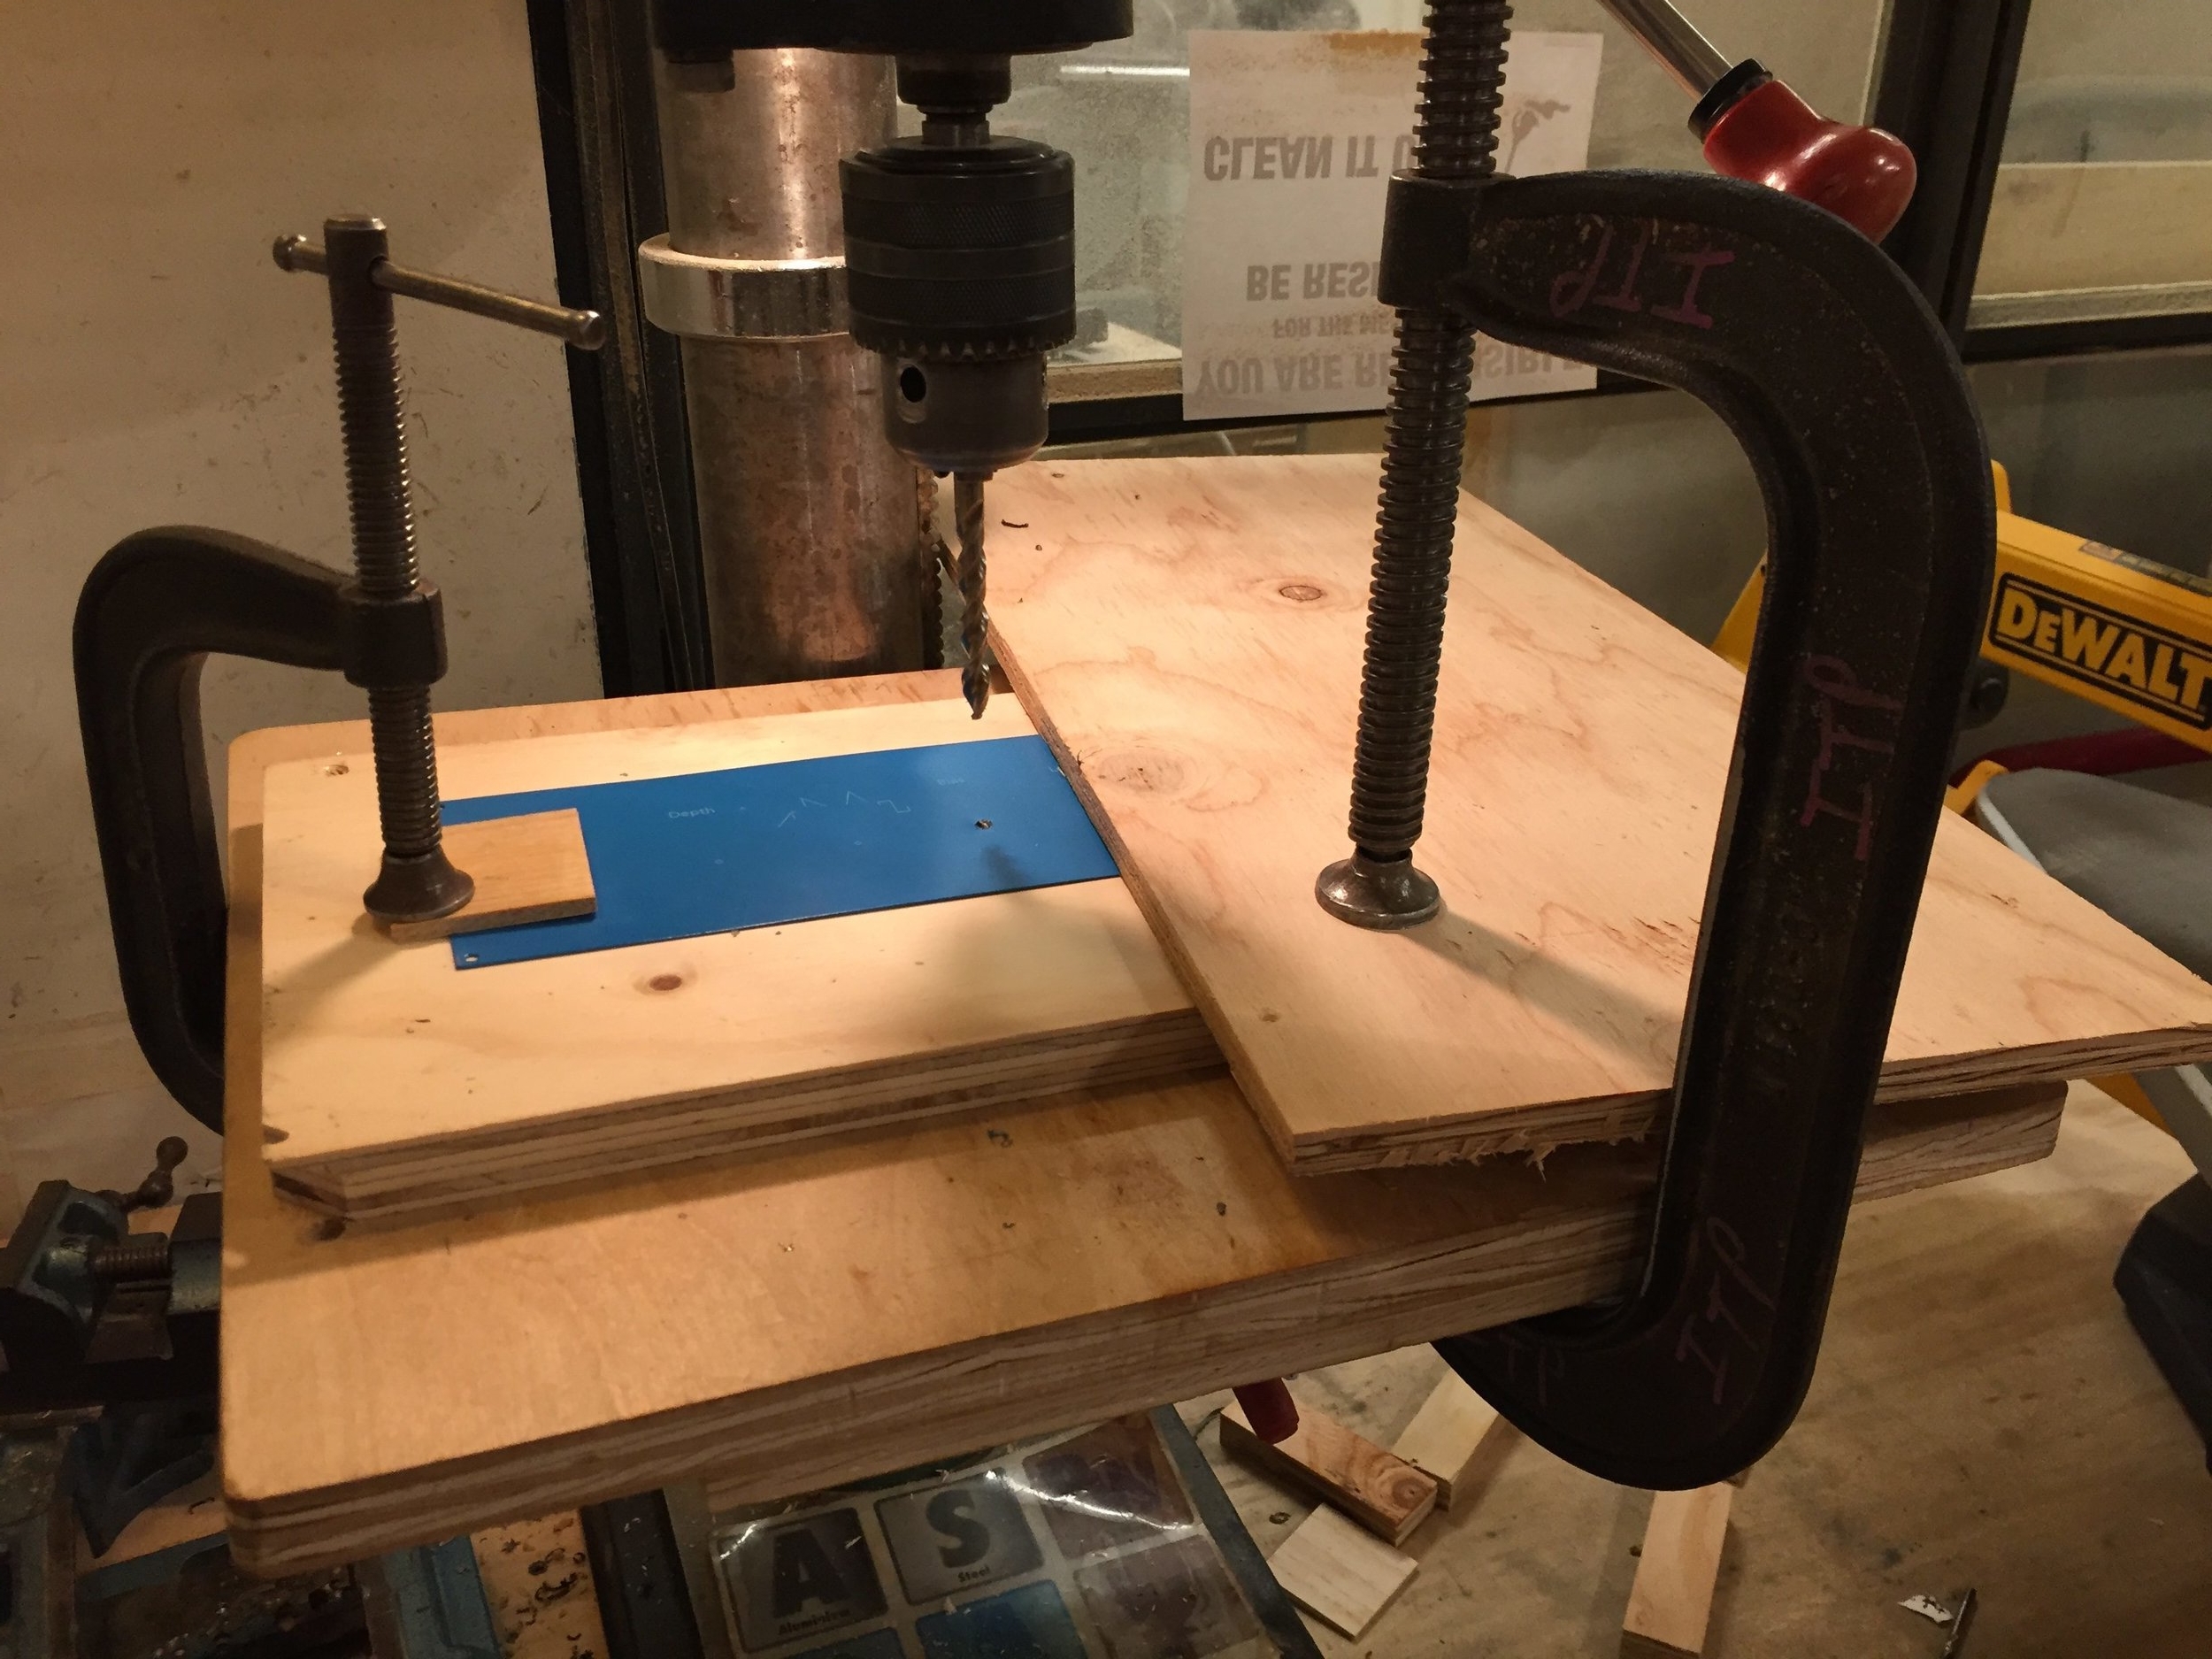
I learned quickly that because of the rigidity and thinness of these metal pieces, both sides of the plate had to be clamped down to get the perfect hole.  One of my holes is a little eaten up because the metal curled up the bit when one side wasn't clamped down as seen in the above picture.

Here is how I made the rest of the holes:

IMG_2771-2-e1480530815113.jpg

Next time, I will bite the bullet and purchase the stepper bit because I'm sure it would have cut my time drilling these holes in half.

The final result
IMG_2774.jpg

Front plate

741B9959.jpg

Back plate

741B9960.jpg

1-3 minute animated story -- They can't all be winners ;)

For our second animation assignment, we were asked to work with Adobe After Effects. Here is the post with the initial story idea and the storyboard.

This was probably the hardest thing I've ever had to do. Create a 1-3 minute story in After Effects and animate it. This is what Grant Henry and I were able to come up with.

Process in Animating the Character

From searching through youtube videos to create a walk cycle, Grant came across the Duik plug-in in this tutorial that helps with rigging the character.  By using the puppet tool, bones are created which helps to create realistic movements and walk cycles.   I didn't quite master the plug-in, but it might prove useful at a later date.

Duik helps with the squish and stretch components in a character -- something that is very time consuming to do otherwise.

What worked in this animation

I think that using live footage for the background really helped for us to create the environment for the lamp. I think I would do this again, because I'm not so great a animating at this time, having a recorded background environment helped to fill out the story.

I liked that we ended up using the documentary-style story. This allowed for the story to jump around without it feeling to disjointed.

I'm very happy that we didn't decide to have a mouth in this animation... I feel like that would have made it just that much more difficult.

What we might do differently

To just name a few issues...

  1. Tracking points on the wall where we have the poster so that it looks more realistic to animate
  2. Speed up some of the key frames so that the lamp doesn't appear to be moving in slow motion
  3. improve the walk cycles ;)

Overall, it was a great experience.

After Effects is a very powerful tool that I feel I have just scratched the surface of. There is still so much to learn and I will continue to work with it to attempt to get comfortable in the software.

Assignment 3: Laser Cutter

For the second 3rd class of Intro to Fabrications, we were introduced to the laser cutter. We were tasked to try out different materials and spend some time getting familiar with the cutting and etching abilities of the laser cutter.

With the upcoming holidays, I was interested in attempting to make some ornaments for my family.

I'm also interested in working with more raw materials rather than just plastic acrylic.

My Project

I worked on all laser printers 50W, 60W and 75W so I now feel comfortable on all machines.

I decided to use acrylic of two different styles, plain white and marbled white, to create a snowflake ornament that had an etched leather hanging strap.

I decided to use acrylic of two different styles, plain white and marbled white, to create a snowflake ornament that had an etched leather hanging strap.

I used Adobe Illustrator to create swirls for the etched leather

I used Adobe Illustrator to create swirls for the etched leather

This was the end result after many 5 replications on the laser cutter

IMG_9891-e1479340805968.jpg

And here is the acrylic snowflake process:

This is the test cut on cardboard

This is the test cut on cardboard

And here is the actual cut in acrylic:

And here is the actual cut in acrylic:

Here is the end result

Here is the end result

Because the leather wasn't treated and was all black, it was hard to see the etching on the hanging tie, so I may not do that the next time.

I did enjoy working with leather in this instance and will try to think of another applications where the usage of the laser cutter is more obvious.